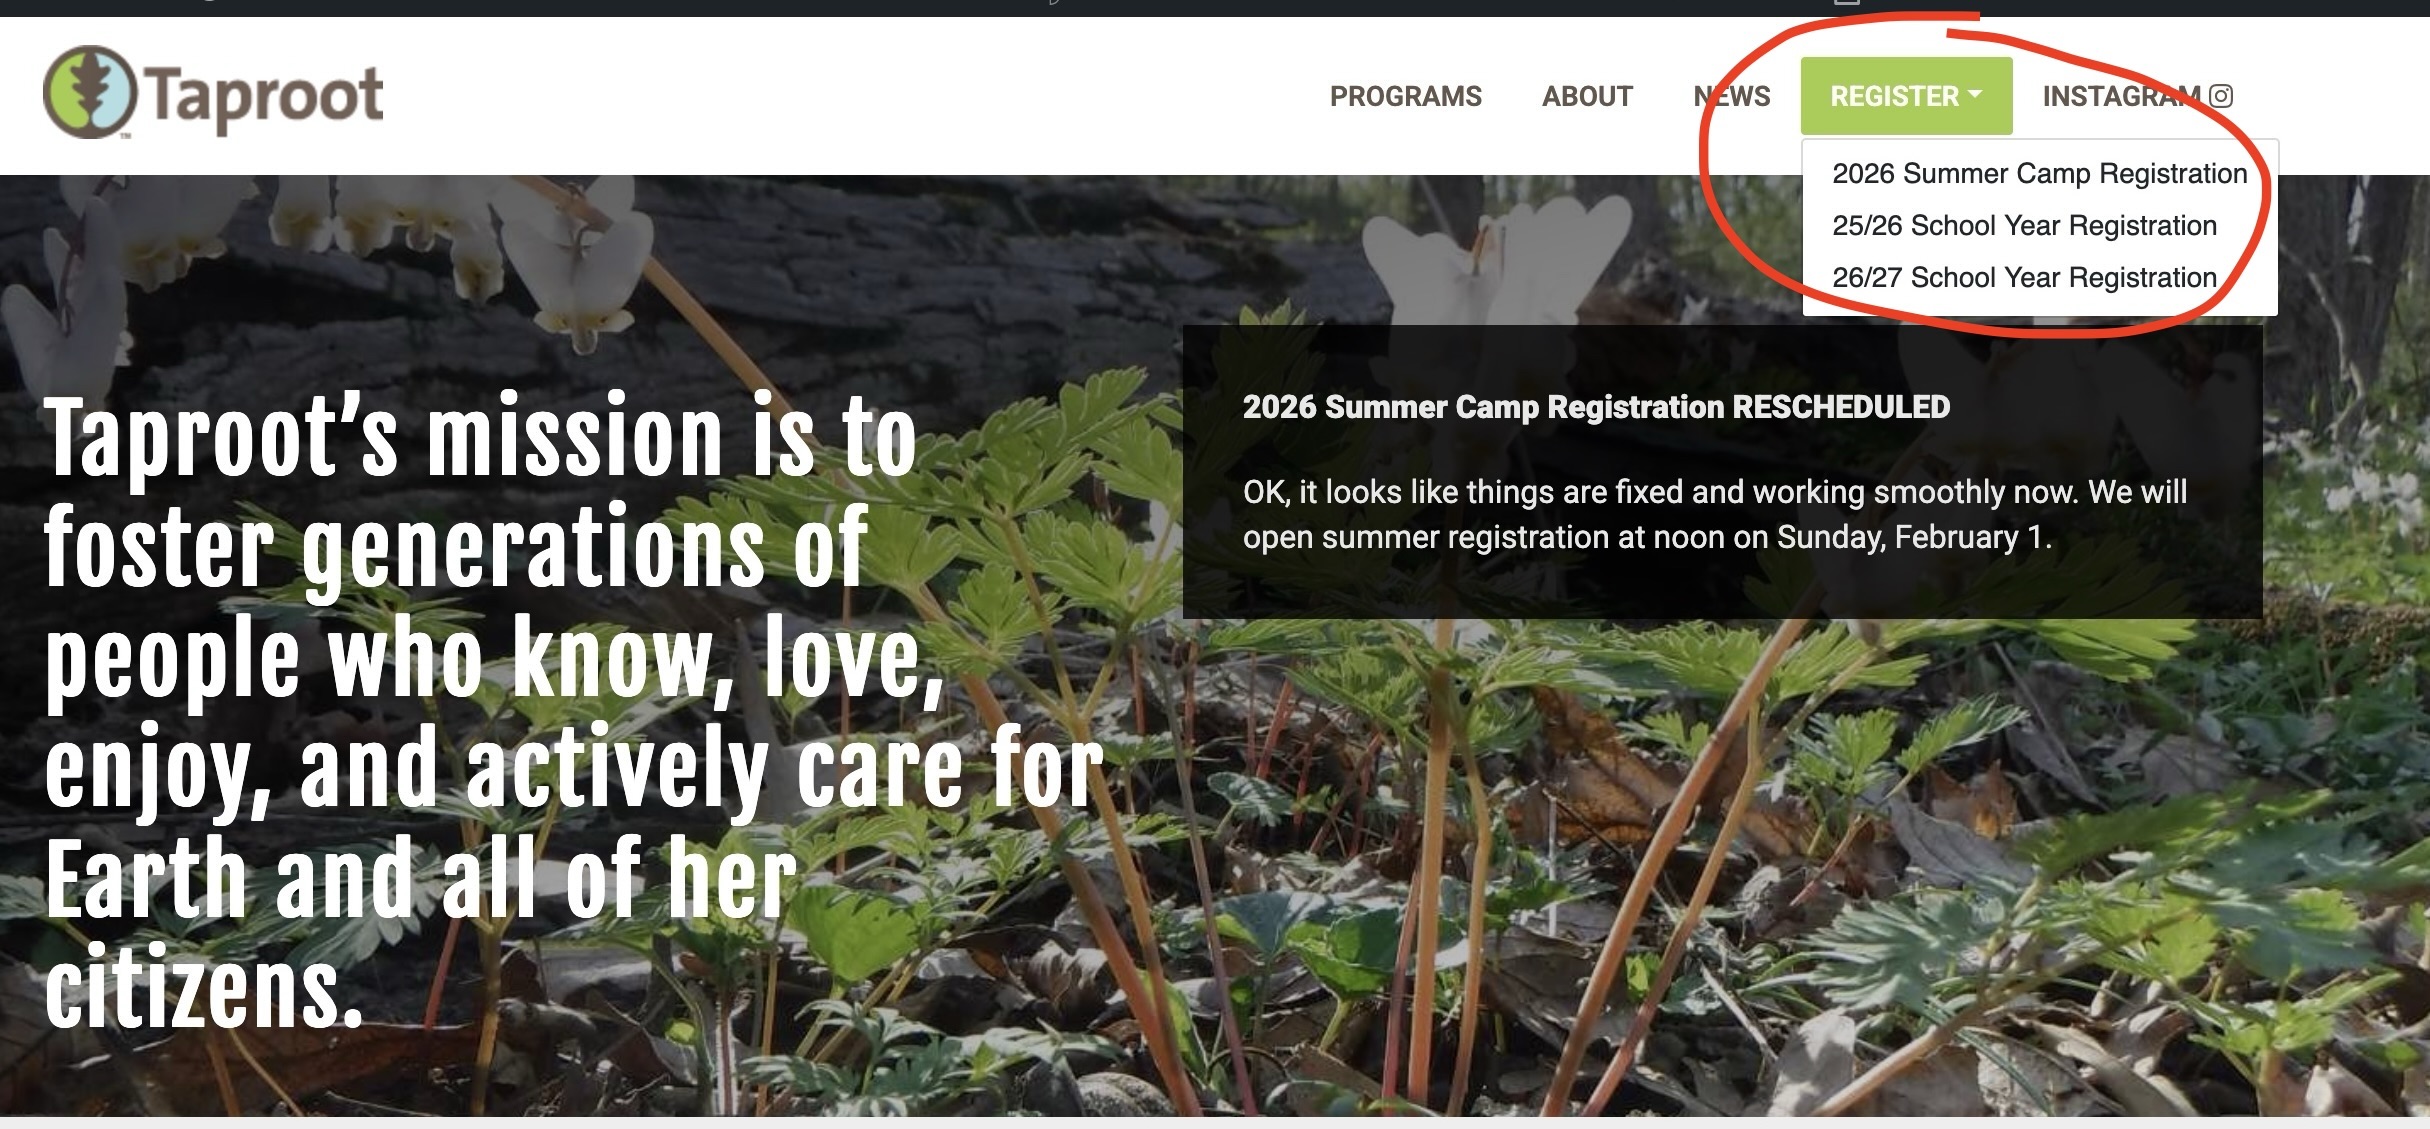
Registering for 2026 Taproot Summer Camp
Registration information, tips, and troubleshooting options
Fill out your information–name, address, phone, etc. and information for a 2nd parent/guardian if you wish. Note: This registration information is how we make the camp contact lists. If you want a second parent/guardian to receive Taproot communications, please input their information here.
When this is finished, you’ll automatically start creating your first child account.
In addition to your child’s name and birthdate, you’ll need to indicate your preference for photos of your child in Taproot, tell us their preferred name, T-shirt size, detail any special health needs, and complete two consent and release of liability forms.
There is also the option to tell us any other information about your child that will help us give them a positive experience.
Now you’ll see the 2026 Summer Camp Selection form. This is where you can select the weeks of camp you want for the particular child you’re registering at this moment.
TIP: Look in the upper right corner of the screen to see whose account you’re in.

Camps are listed by week from youngest (Sprouts) to oldest (Leadership Camp).
At the very bottom of this form are the Early Drop Off (EDO) weeks. You can sign up here for the entire week for $25. Alternatively, you can drop in (without registering) for $10/day, payable with cash, check, or Venmo on site. EDO is not available for Sprouts Camp.
The camp listing will show how many spots are still available for that week. When all spots are taken for a week, the listing says “Will add to Waitlist.” Adding your child to a waitlist does not cost anything and does not obligate you to take a spot if one should come open later. There is no way to predict if or when spots will come open, but sometimes they do!
When you have selected the camps you want for that child, go to the bottom of the form and click “GO TO NEXT STEP.” You must select at least one product for this button to work. TIP: If you don’t want to sign up for a camp yet, you can click “Skip this step” and move on to create another child account. When you want to go back and sign a child up for camp weeks, click “Home”, then click the progress bar next to their name and click “2026 Summer Camp Selection”:

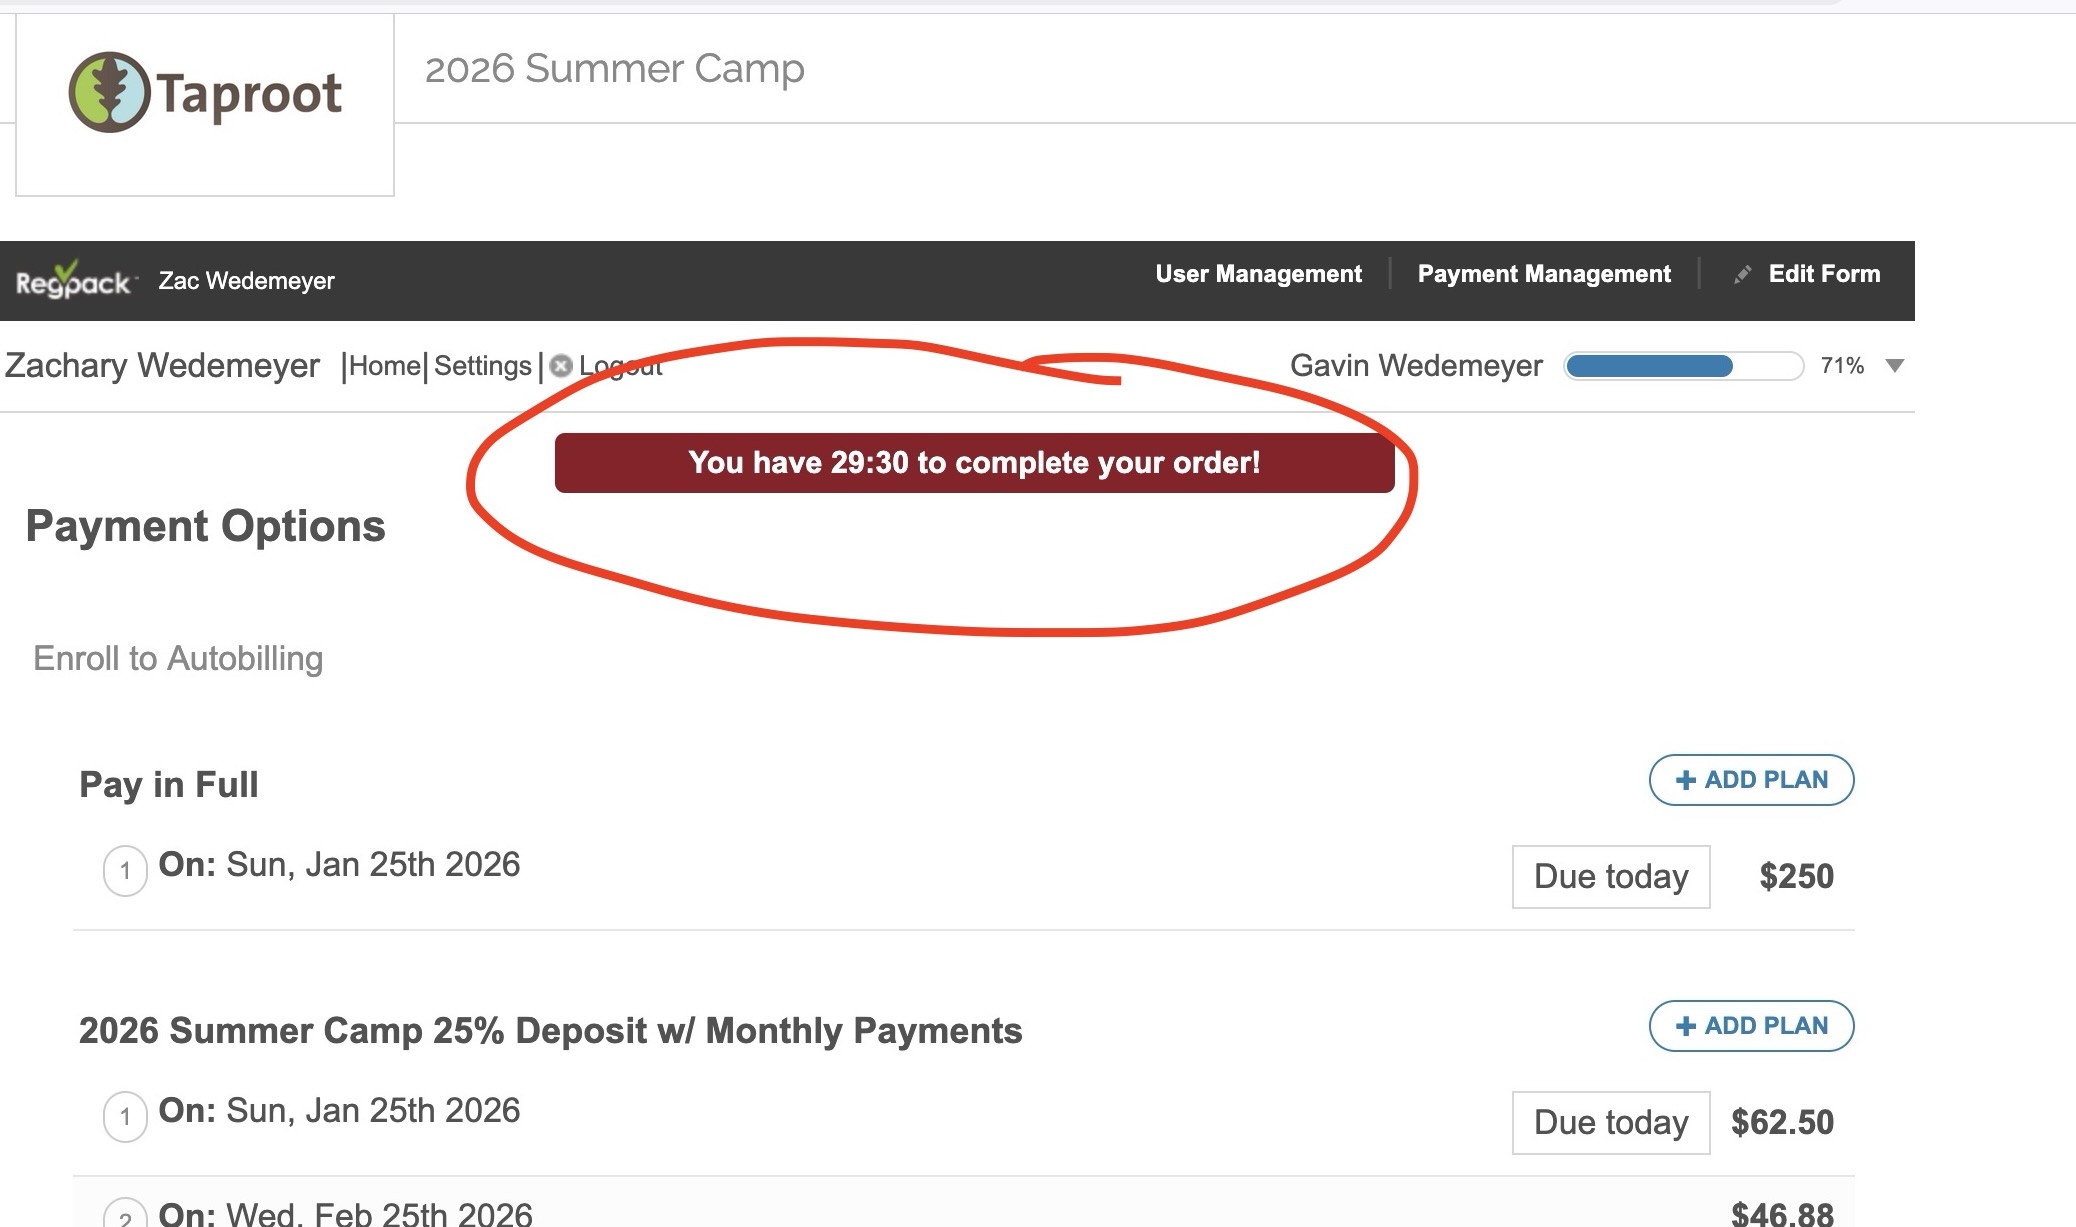
When you select a camp for a child, you will see a red notice that says how much time you have to complete the order (30 minutes). This is the cart timer. You must make a payment within that time in order for your child to be registered. If the time expires, your child will not be registered for that week until you make a payment. If there are still open spots, you can make a payment at any time to reserve the spot. But if all the other spots get filled in that week, your child will be moved to the waitlist and will not be enrolled in the camp.
After you’ve selected the camp weeks you want, click “GO TO NEXT STEP”
Now you’ll see a screen that shows which camp weeks you’ve selected for this child. If it’s correct, click “CONFIRM PARTICIPANT”. This will take you to the Payment Options form. Here you can decide to pay in full OR pay a 25% deposit and enroll in an automatic payment plan that will divide the balance into monthly installments based on when you sign up. Installment plans are set to be paid in full by June 5, 2026. Click “Add Plan” for whichever option you want, then click “GO TO NEXT STEP”.
You’ll automatically move through each child’s account to select camp weeks, confirm order, and choose a payment option.
After going through each child’s account, you’ll get to the Checkout form. There is some confusing stuff here so be mindful! You’ll see which kids you are about to pay for in this transaction. You can add or exclude kids from this transaction at this point. If you have chosen to pay the deposit and installments, you can now change your mind and click “Pay Full Balance Now” or click “View Plan” to see your payment schedule.
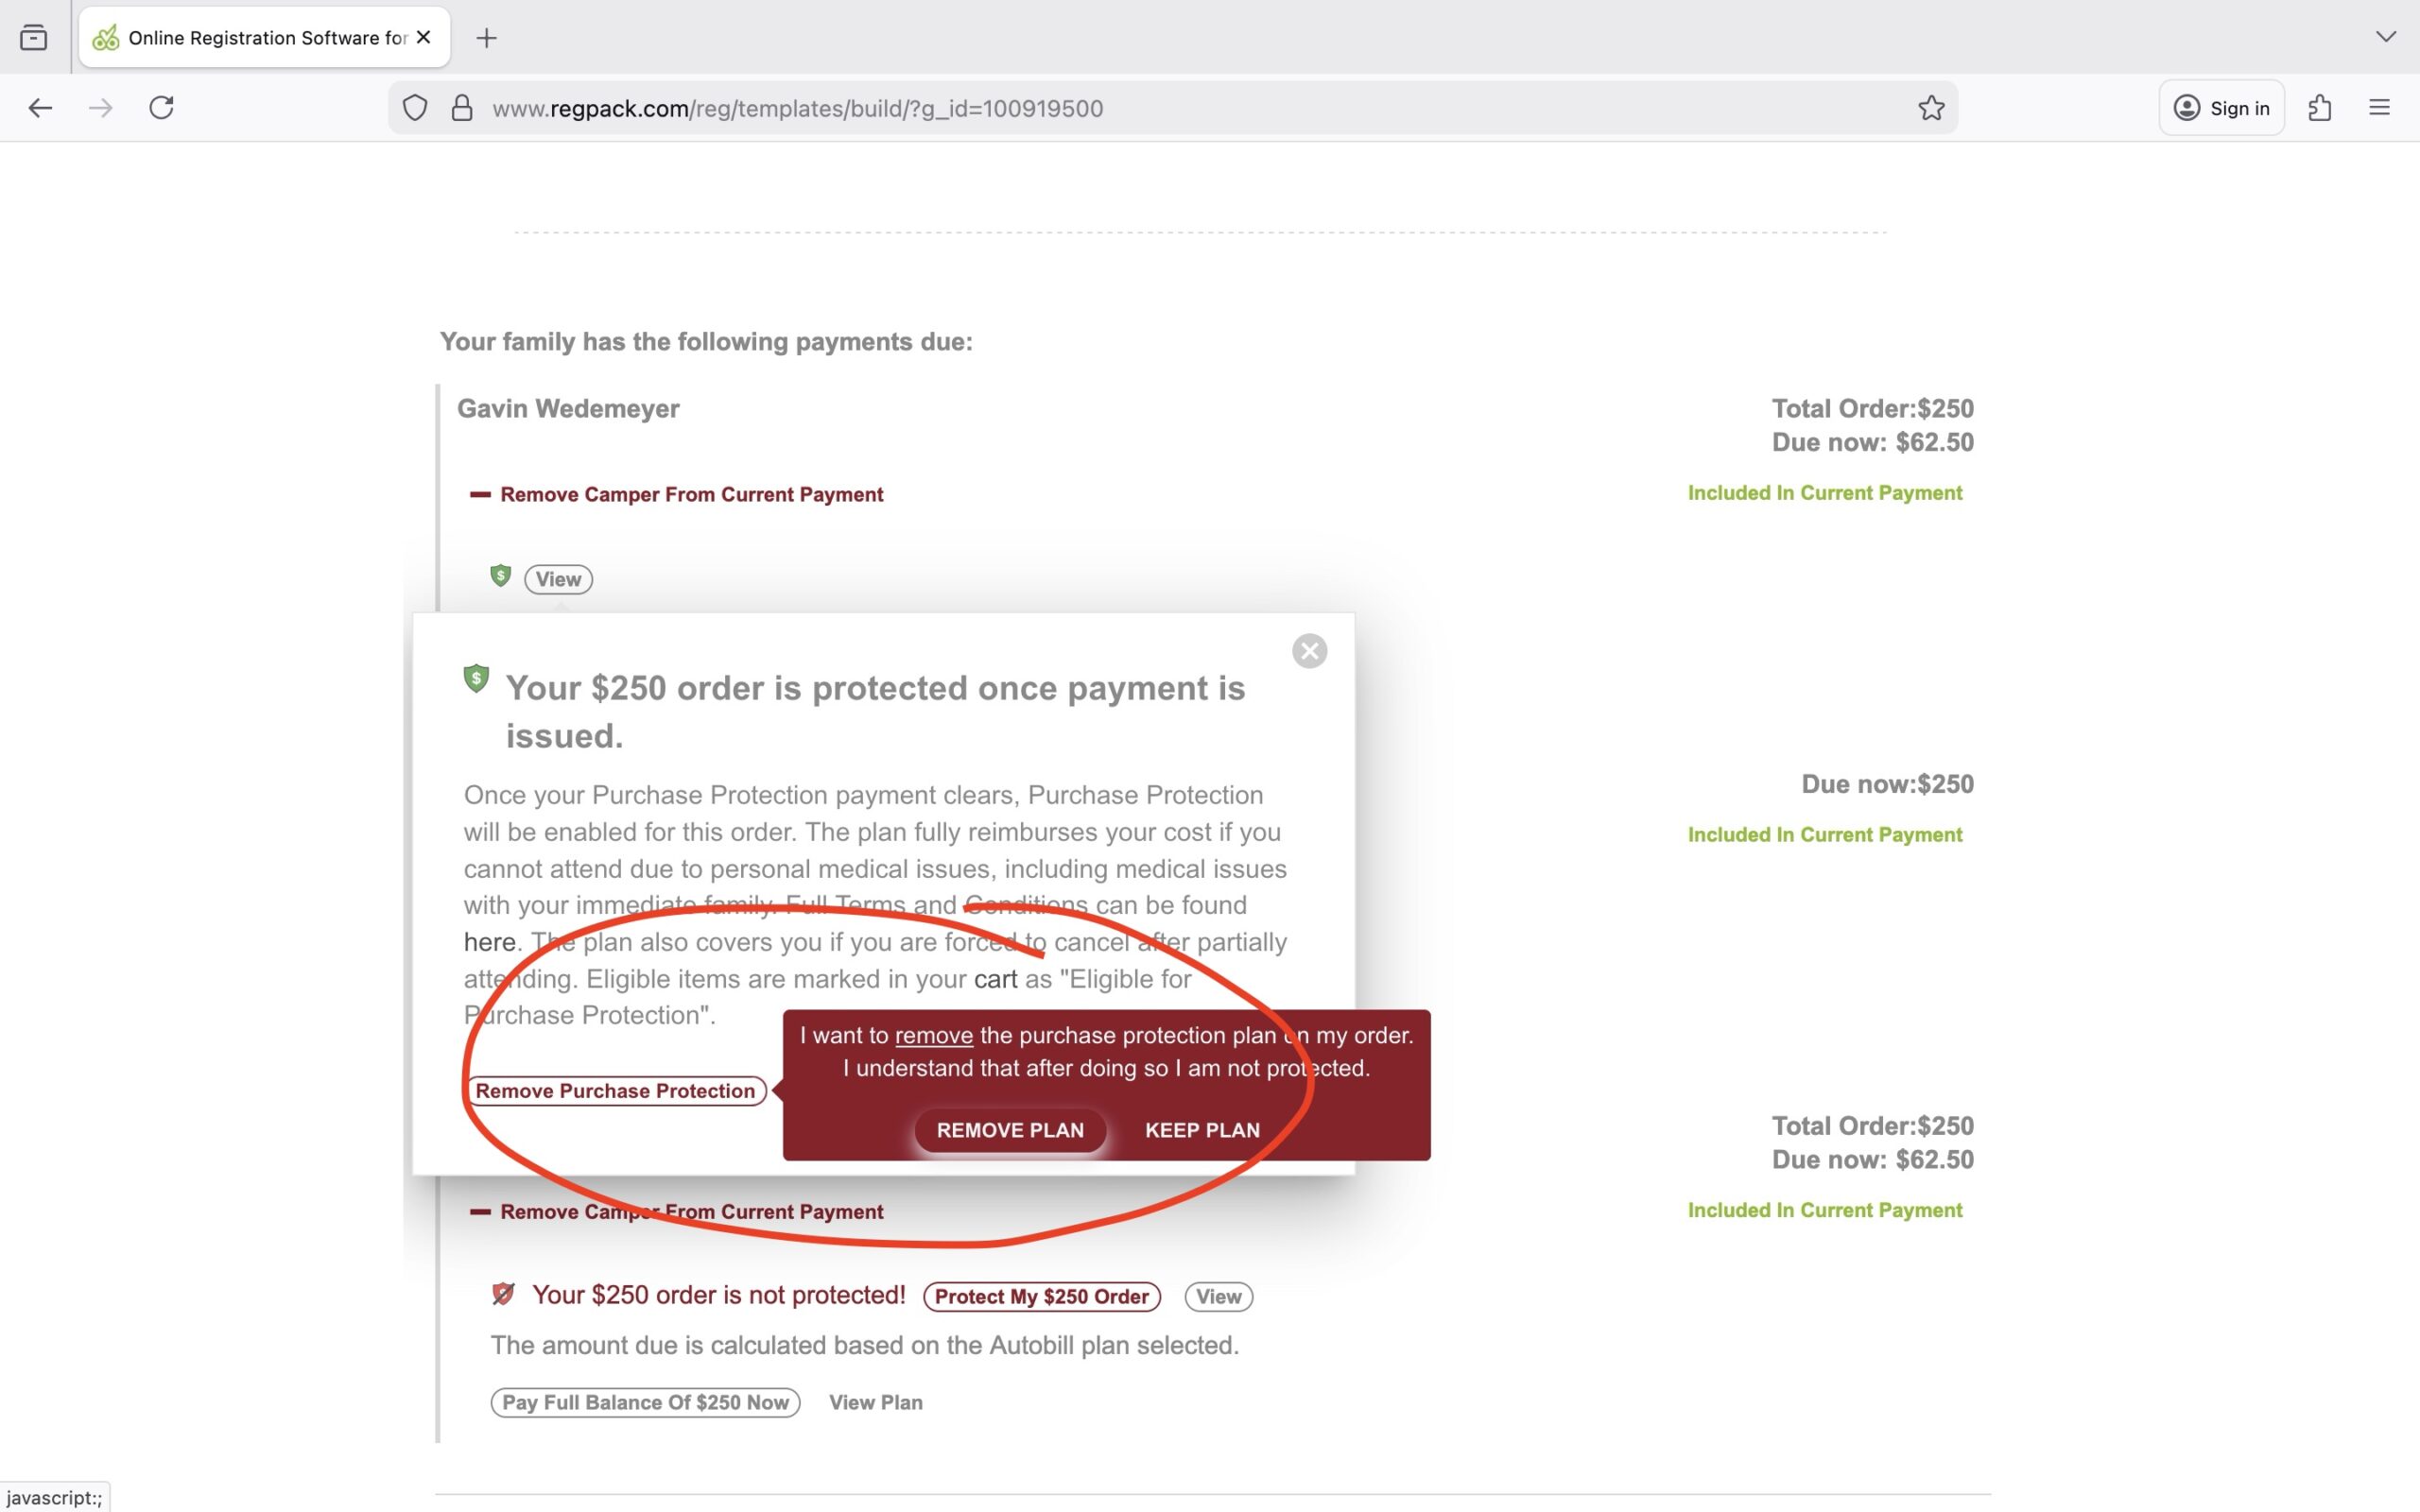
IMPORTANT: You’ll see a red notice “Your order is not protected!” This is about a purchase protection insurance policy that is offered–for a fee–by the payment processing company, NOT Taproot. It says it offers protection in case your child cannot attend camp. Taproot has no influence on whether a claim is paid or denied, and we cannot remove or alter this language from the checkout screen. We have our own refund policy, which is meant to be reasonable and compassionate. Choose the Purchase Protection option at your own discretion. Again, Taproot has no control over this, so if you purchase it and then change your mind, we can’t remove it or issue a refund.

If you accidentally select Purchase Protection, you can remove it by clicking “View” next to the green shield icon, then click “Remove Purchase Protection.” This only works before you’ve actually paid for it.
Next, choose whether to pay with credit/debit card or directly from a bank account.
Enter your payment information.
Click the green “PAY $XXX NOW” button, then click it again. (You’ll again have the option to pay in full if you want.)
Yay! You did it! Thanks so much for signing your kids up for Taproot Summer Camp.
Other information:
MOST IMPORTANT TIP: Click the “Home” link next to your own name in the upper left of the screen to go to the Dashboard. Here you will find your kids’ names and can click the progress bar next to their name to find the various registration forms. This is the first thing to try if you want to change something or if things are not working or making sense.

Adding a camp to your child’s account
On the Dashboard, click “Add Camp” next to the child’s name, then select the camp week you want. You’ll automatically be directed to the checkout screen to pay in full. If you wish to pay the deposit and installments, click the “Home” link at the top to go to the Dashboard, click the child’s progress bar, and click “Payment Options” to select the deposit/installment option.

Removing a camp from your child’s account
You can remove your child from a camp list or wait list before making a payment (if you have already made a payment for the camp, you will need to email info@taprootnatureexperience.org and Zac will remove it for you). On the Dashboard, scroll down to the “My Orders” section and click on the relevant child’s name. Select the week you want to remove and click the red “Remove” link. Again, once you’ve made a payment for that week, you can’t remove it yourself. Email Zac.

Reviewing or changing your information
On the Dashboard, click the progress bar next to your name at the top. Click the relevant form and make the desired changes.
Reviewing or changing a child’s information
On the Dashboard, click the progress bar next to the child’s name, then click the relevant form. Or click “Go To Member Application” under the child’s name. Make the desired changes.
We hope these instructions will help you navigate the Taproot registration process on your own. As always, if you hit a snag and can’t figure it out, email Zac.
Above all, thank you so much for understanding the critical importance of nature and positive human interaction in your child’s life and thanks for being in the Taproot community!